Cosmetic display boxes should be planned around the retailer's available space, the number of saleable units, and the way staff will replenish them. A display that looks full in a launch photo may become confusing after the front products sell. Design the full, partly empty, and refill states before approving the structure.
This guide covers paper-based countertop and shelf displays for a defined beauty assortment. It separates the display's merchandising job from the individual product carton and the outer distribution packaging.
Get the retail space before choosing the unit count
Ask the retailer for the permitted outside width, depth, and total height. Include the header in the height measurement. Also confirm any shelf above the display, the shopper's likely viewing angle, and the direction from which staff can refill it.
Use the finished sale unit as the measurement basis. If the product is sold in a carton, measure that carton. If it is presented as a bare bottle or tube, include its cap, pump, and other projections.
Capacity is a result of the usable footprint and layout. It should not be chosen independently and forced into the counter space afterward. A taller header may add branding area but still be unsuitable under a shelf or beside a register.
Separate facings, depth, and testers
Three counts are often mixed together in an early brief:
- Facings: the positions the shopper sees across the front.
- Units deep: the sale units stored behind each front position.
- Testers: demonstration products that are not part of the saleable stock count.
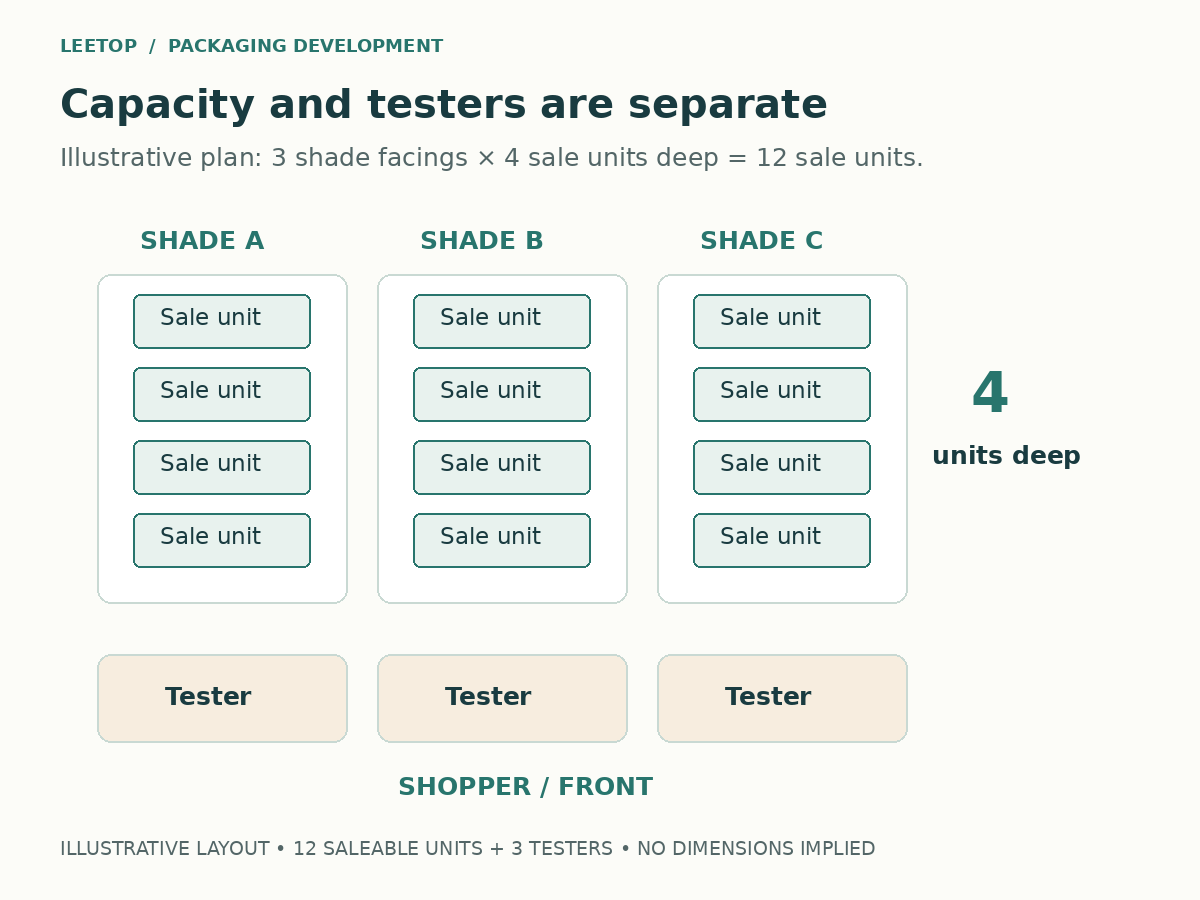
For an illustrative three-shade assortment, one facing per shade with four sale units deep gives 3 × 4 = 12 saleable units per display. If each shade also needs a tester, the layout must accommodate three additional positions or a separately defined tester area.
Do not place testers into the drawing and still call all 15 positions saleable capacity. Record the two totals separately. Whether a tester needs securing, replacement, or a removable holder should be agreed with the retailer and brand.
Make the display readable after products sell
Use a mockup with the planned products, then remove the front unit from one lane, several units from another, and all stock from the third. This reveals problems that a fully loaded image hides.
Check whether the next product remains visible, whether the shopper can reach it, and whether the empty lane still identifies the intended shade. A removable shelf label or printed position marker may help staff return stock to the correct place. Confirm who supplies that identification and how it is updated.
If you use stepped rows, inspect the actual sightline from the likely shopping position. Raising a rear row may improve visibility, but it changes the support geometry and loaded height. A higher front wall may contain products yet hide important parts of the carton. Review containment and visibility together.
An open display tray does not automatically advance stock to the front. If forward movement is required, specify and evaluate that mechanism rather than assuming products will remain neatly faced as units are removed.
Let replenishment influence the divider design
A good divider does more than separate shades. It should allow the intended refill action without forcing staff to remove neighboring stock or bend the header.
Ask a person unfamiliar with the mockup to refill it using the supplied instructions. Watch where their fingers need space, whether the product catches on a divider, and whether the arrangement is obvious when a lane is empty.
Avoid permanent shade graphics in a location that becomes wrong whenever the assortment changes. If seasonal shades share a display, decide which parts of the identification are replaceable and retain an approved layout for each version.
For a tray that holds individual boxes, lock the retail carton construction before finalizing the divider grid. A small change to each carton can accumulate across multiple facings.
Choose between empty and prefilled delivery
An empty display lets a retailer or fulfillment partner load products locally. A prefilled display can reduce store-level setup, but its transportation and unpacking sequence need to be developed as part of the project.
Define what the receiver should do: unfold the tray, install the header, insert dividers, add testers, remove a protective cover, or simply place the unit. List the actual steps. “Retail-ready” is not a complete packing instruction.
For prefilled delivery, identify what keeps the products in place while the unit is inside its shipping packaging. A tray developed for countertop use is not automatically a parcel shipper. Assess the filled display, restraints, outer carton, and intended distribution route together.
No specific board weight is a universal answer. The loaded weight, unsupported areas, expected handling, and time on display should guide structural development and the agreed evaluation.
Count the rollout without mixing boxes and products
Suppose a hypothetical pilot covers 24 stores. Each store receives one display with 12 saleable units and three testers. The brand also wants three spare displays, shipped empty.
The initial requirement is:
- Display structures: 24 for stores + 3 empty spares = 27.
- Saleable products: 24 stores × 12 units = 288.
- Tester products: 24 stores × 3 testers = 72.
- Products allocated to the launch: 288 saleable + 72 testers = 360.
Replenishment stock is additional. If the three spares must arrive prefilled, their product quantities also need adding. This example is planning arithmetic, not a LEETOP minimum order or a customer result.
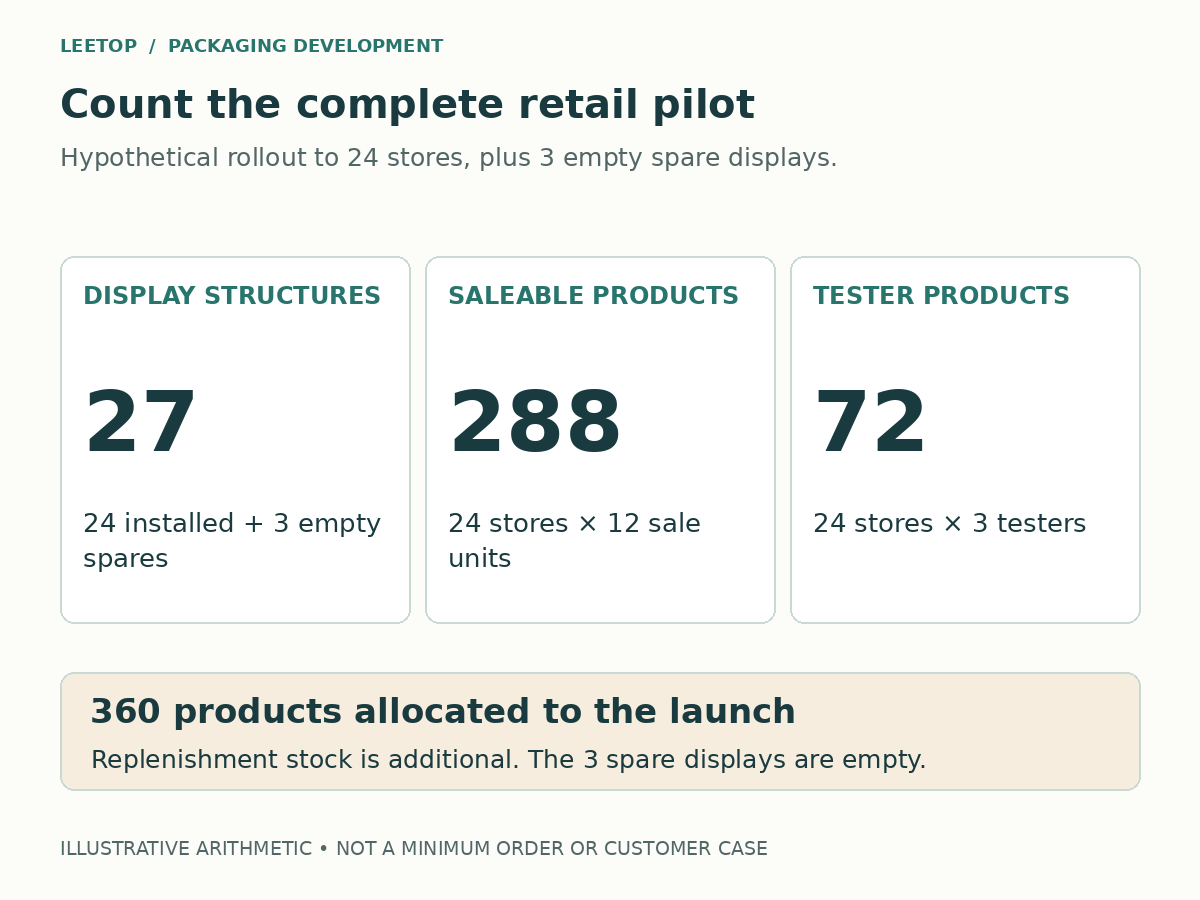
This separation makes the request clearer for the packaging supplier, product planner, and fulfillment team. It also prevents a quote for “27 displays” from being mistaken for 27 complete product-filled kits.
Approve the display in four retail states
Review the prototype fully loaded, partly sold, empty, and being refilled. For each state, note stability, access, visible identification, and any deformation. Use the intended countertop or a representative surface with the same space limits.
Agree on the load and handling conditions for the project. Check for base sag, divider movement, header instability, and damage during the proposed setup action. A brief sample demonstration should not be described as proof of a particular retail lifetime.
Keep the approved unit arrangement and setup instructions with the structural sample. If the retailer changes the footprint, product count, or tester plan, reopen the structural review instead of treating it as an artwork-only revision.
Questions about cosmetic counter displays
How many products should one display hold?
Start with retailer space, product dimensions, desired facings, and replenishment frequency. There is no standard count that suits every cosmetic assortment. Distinguish sale units from testers.
Does the display replace individual product packaging?
Not necessarily. A display may hold already boxed products or primary containers. The brand must review protection, product information, and the intended sale format separately.
Can I change shades without redesigning the display?
Possibly, if the product dimensions, allocated quantities, and identification system remain compatible. A new shade name alone may need a graphic update; a different container or assortment can require a layout change.
Send a retail layout brief
Share the retailer's space limits, finished product dimensions and weights, units per shade, tester plan, and whether delivery should be empty or prefilled. LEETOP can review the paper-packaging scope and confirm which components can be coordinated for the project. Send the brief for review with your display quantity and destination.